LevelPost
Postprocess user-created levels to add custom textures.
Version 2021.06.23
Arne de Bruijn
This is an unrelated, unsupported tool. Use at your own risk!
The tool requires .NET Framework 4.5, which you might need to install if you're on Windows 7.
Source code available on github.
Thanks to:
Revival Productions for a worthy successor to the classic tunnel shooters,
discord #level-editor-general for awesome levels and inspiration.
Changes
2021.06.23 - ignore case when processing entities
2021.06.18 - multiple bundle files, support replacing entities, minor fixes
2019.05.22 - reconvert simple textures to bundle textures if possible
2019.05.21 - better bundle material messages, fixed probe messages
2019.03.23 - experimental reflection probe support
2019.02.19 - only materials/entities actually in the bundle are converted, no more prefix
2019.01.12 - plain textures are now updated when converting again
2018.12.20 - add original component on entity replacement, fix texture count, fix empty bundle prefix
2018.12.11 - added entity replacement support, find for dump window
2018.12.01 - added blocky mode for low res textures option
2018.09.08 - added debug option to dump level structure
2018.08.27 - fixed not starting without steam game registry entry (thanks Enula//Hattie)
2018.08.19 - updated for level file format changes in game build 1854
2018.08.10 - initial version
Bundle support
Since version 2018.12.01 there's support to reference materials from Unity asset bundles. See the Bundle tutorial. Since version 2018.12.11 there's support to reference entities from Unity asset bundles. See the Audio tutorial for how to use this for custom ambient audio/music.Steps
Create a png file with the custom texture
Width and height should probably be equal and a power of 2 (256x256, 512x512, 1024x1024, etc.).The texture is stored uncompressed in the level file so 2048x2048 is probably too large (2048*2048*4=16MB).The filename should not start with an existing prefix (om_, ind_, cc_, etc .) since those are ignored by this tool.Example: cust_levelpost.png
Place the png file in LevelTextures subdirectory of the Level Editor
Example: copy to c:\prog\OverloadLevelEditor\LevelTextures\cust_levelpost.png
Launch the Level Editor and use the texture in a level
The texture should appear in the texture list just like the built-in ones.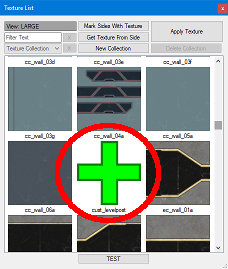
Example: levelpost.overload
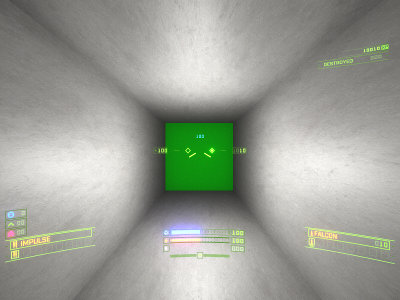
Export the level from the Level Editor
The texture will appear plain green if you play the level now because it is missing in the game.Example: export to c:\ProgramData\Revival\Overload\levelpost.sp
Launch the LevelPost tool
Verify the Level editor directory is set correctly under Settings
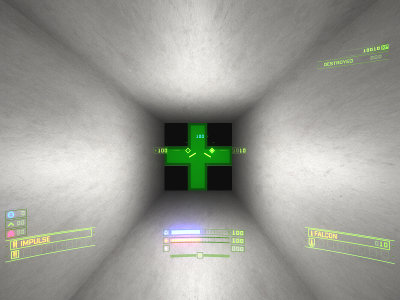
- Select your exported level file and press Convert
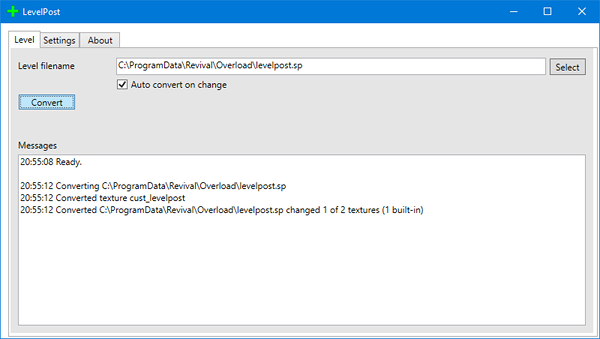
- Enjoy glorious textures