LevelPost Audio Tutorial
Unity
Install Unity
If you haven't done so, install Unity. You need the same version of Unity that the game uses, which is 2017.4.10f1. Get it from: https://unity3d.com/get-unity/download/archive. Choose the Unity Installer to select which components you want.
You need the main component, Unity 2017.4.10f1 and the Linux Build Support and Mac Build Support to build asset bundles for these other operating systems.
After downloading (about 0.5GB) and installation you need to create a Unity ID, select the Personal license, and fill in a short questionnaire.
Create project
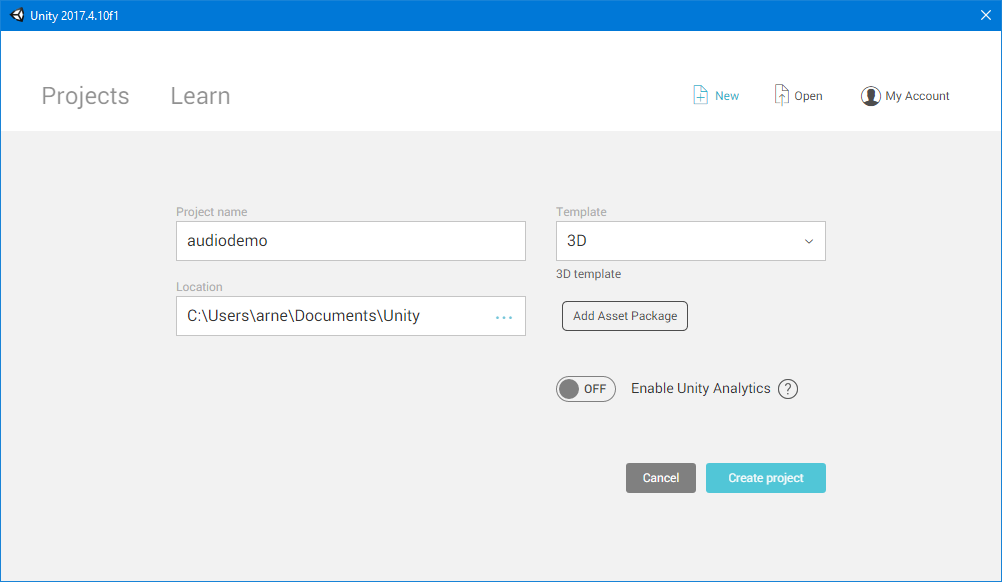
Create a new project audiodemo.
Import audio file
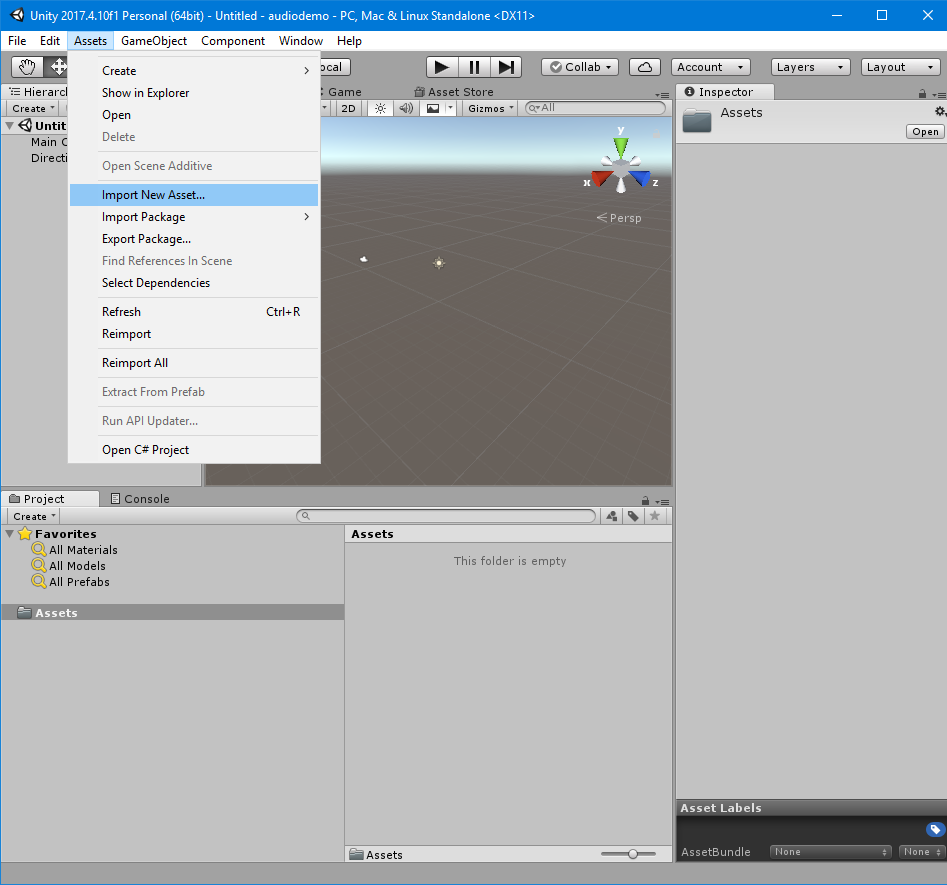
Select Assets, Import New Asset… from the top menu and browse to your audio file or drag the file to the Assets folder. Unity accepts wav, mp3 and ogg files. The file will be compressed again, so it's best to use an uncompressed wav file if available.
Rename audio asset
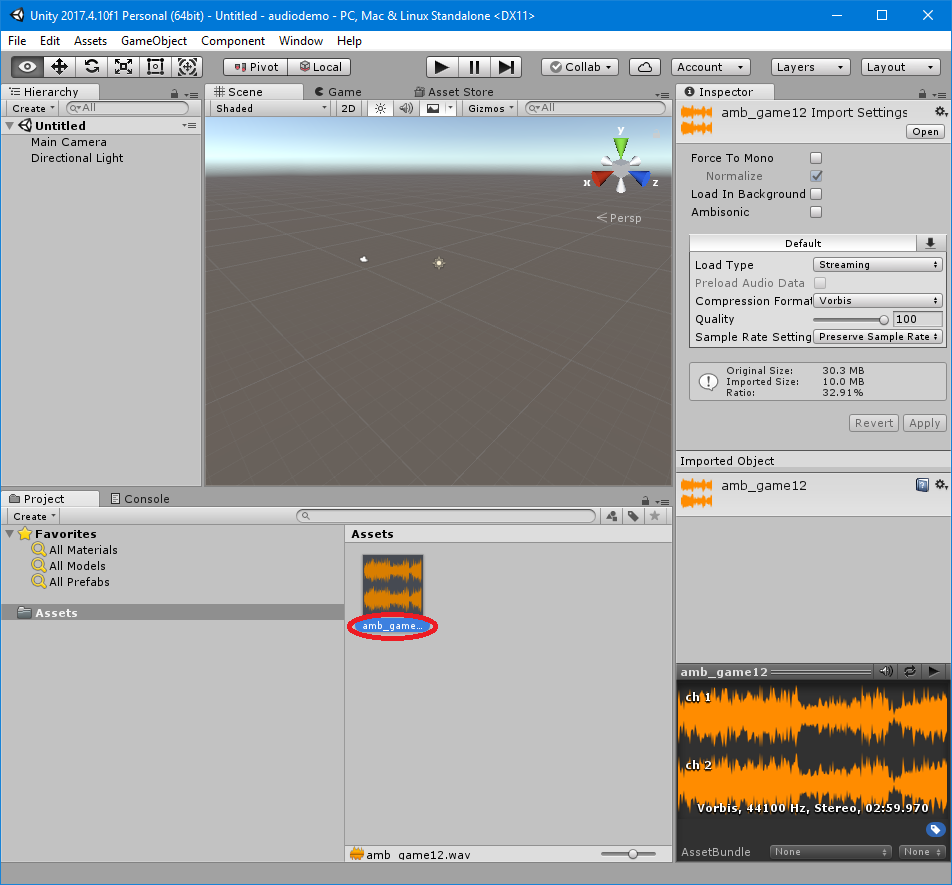
The audio asset name must start with "amb_". Select the audio asset and press F2 to rename the asset.
Create audio source
Create GameObject
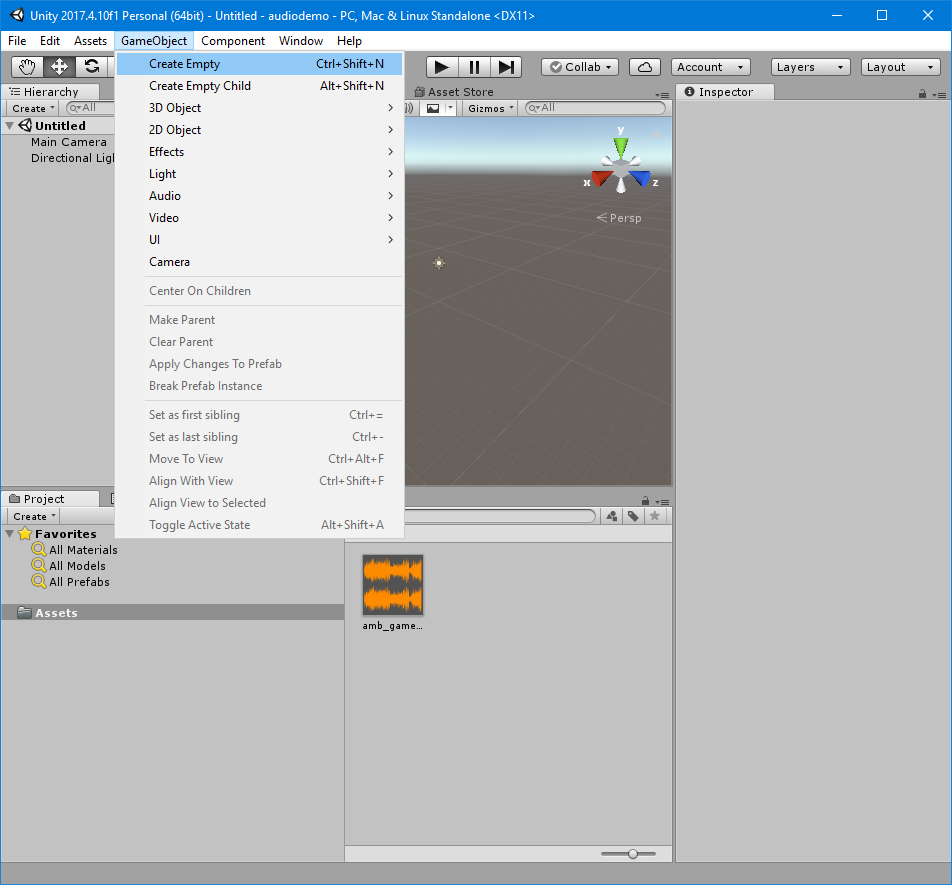
Select GameObject, Create Empty from the top menu. A colored 3d-object will appear in the upper center pane and an entry GameObject will be added to the upper left pane.
Add Audio Source component

Press Add Component in the left pane and enter "audio source" in the search window that appears below the button. Select the Audio Source entry from the search results.
Set Audio Source settings
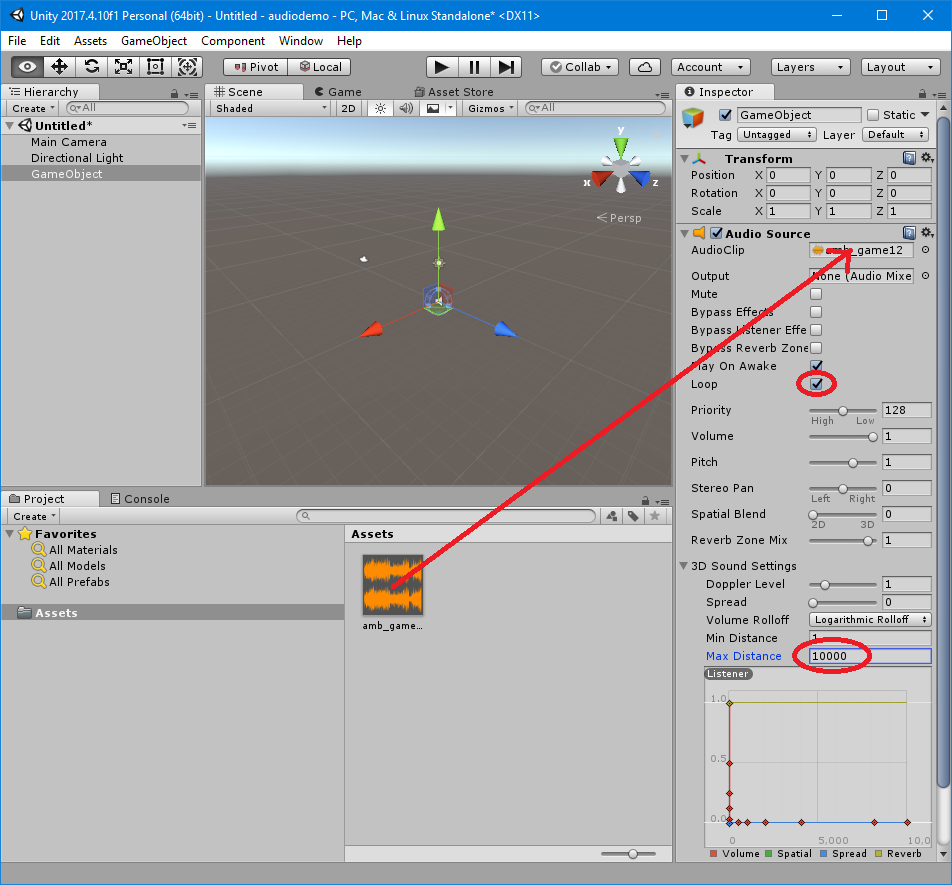
Select the AudioClip for the Audio Source by dragging the audio asset we just created to the AudioClip setting in the right pane. You can also click the small circle icon after the AudioClip field. Select the Loop checkbox to keep playing the audio. And if the audio should be playing for the whole level as with music, enter a large value after Max Distance to prevent stopping the audio if you move away, for example 10000. (If you want true ambient audio you can use a smaller distance and move the Spatial Blend slider to 3D to enable 3D positional audio for the audio asset).
Create prefab

Select Assets, Create, Prefab from the top menu. A white-blue cube appears in the assets folder. Enter the following name: entity_mine_0. If you clicked away before changing the name you can change the name by selecting the prefab asset and pressing F2.
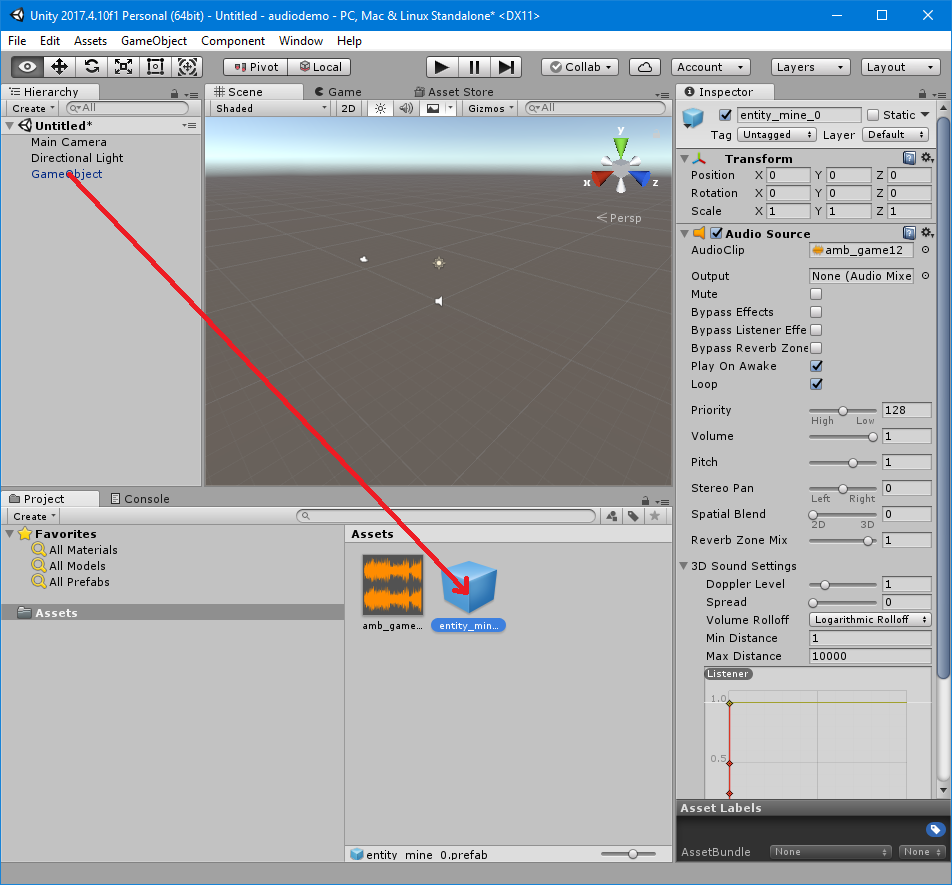
Now drag the GameObject entry in the upper left pane to the just created cube. It should become more blueish. Select the cube. The Audio Source settings we had entered earlier should show up in the right pane.
Create asset bundle
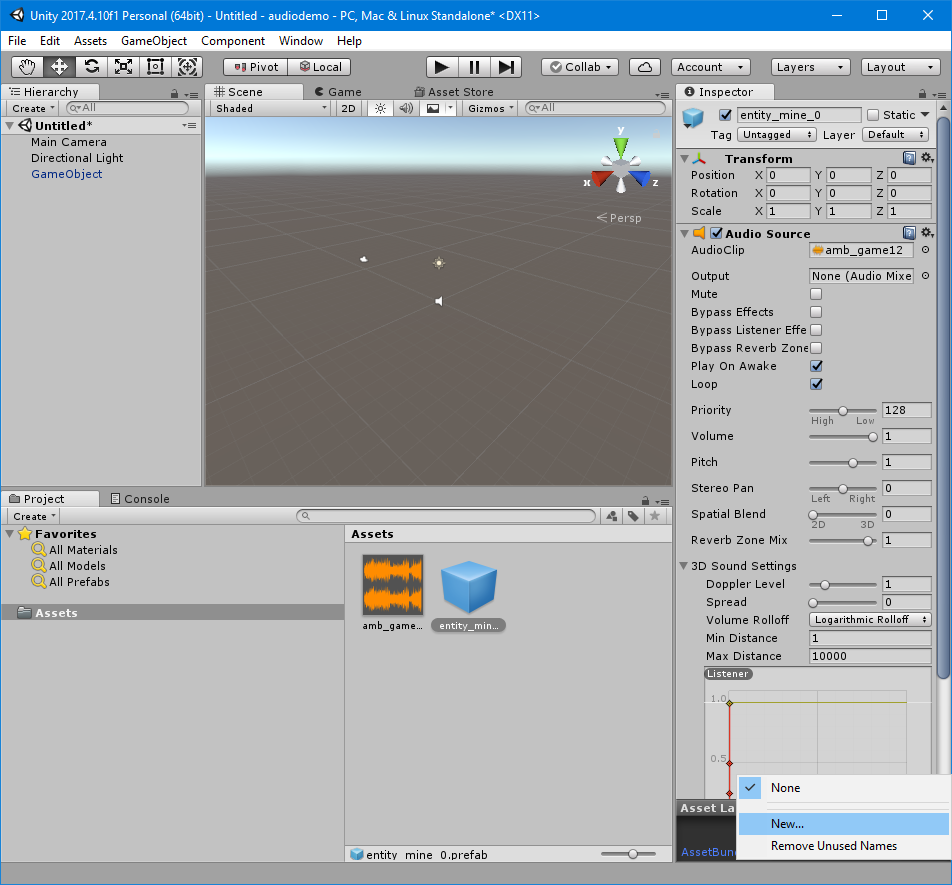
Click on the first None after AssetBundle in the black lower right pane. Click New… and enter an AssetBundle filename, for example: audio
Add editor script
Click Assets, Create, Folder in the top menu. Enter the following folder name: Editor. Open the Editor folder.
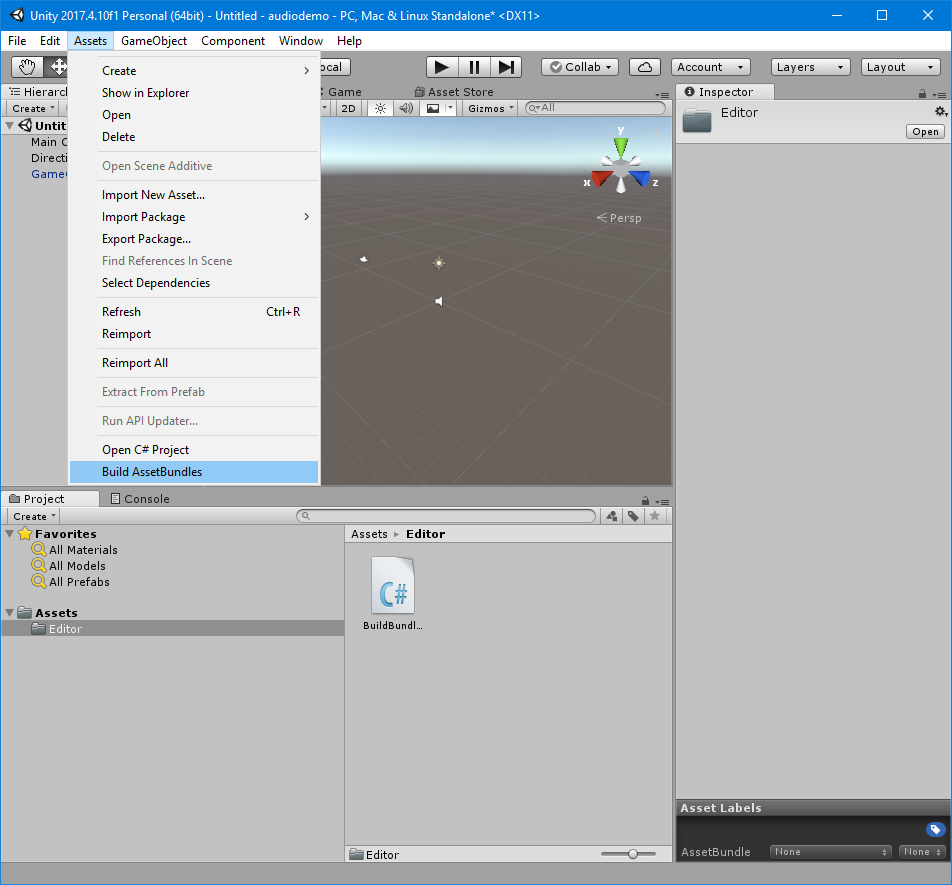
Select Assets, Import New Asset… from the top menu and select the BuildBundles.cs file from this zip file. Now there should be a new entry in the Assets menu: Build AssetBundles. Click it. You should now see a small Building Asset Bundle window popup. If you have Linux and Mac OS X support installed it will appear three times, otherwise Unity will show an error in the status bar. You can ignore the error if you don't have Linux/Mac OS X support, the Windows bundle should already have been build.
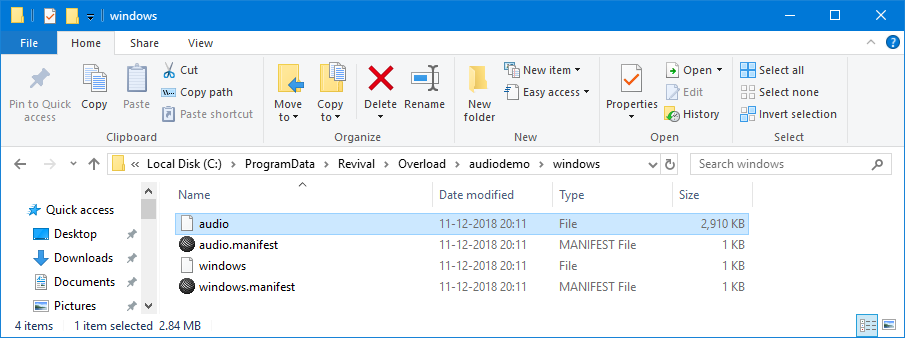
Now the bundle file "audio" should be in C:\ProgramData\Revival\Overload\audiodemo\windows. Only the top file is needed, the others are created by Unity but do not need to be distributed.
LevelPost
You need at least LevelPost 2018.12.11. Update if it's older.
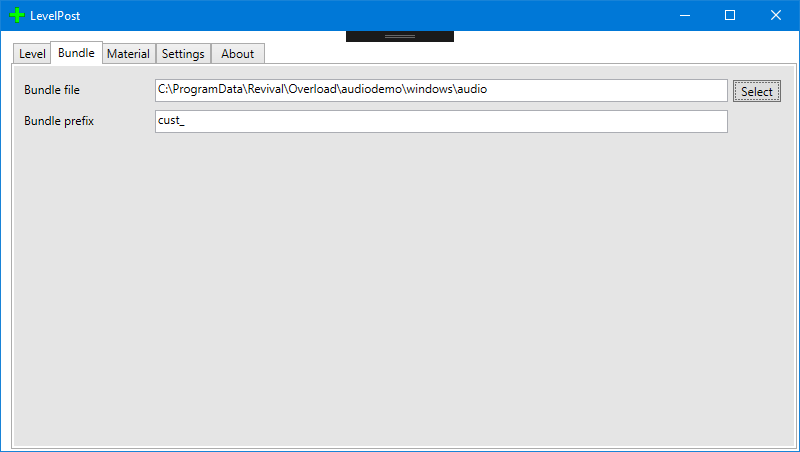
Start the LevelPost tool and select the bundle file we just created in the Bundle tab. The bundle prefix is not used in this case but may not be empty, enter for example "cust_".
Convert level
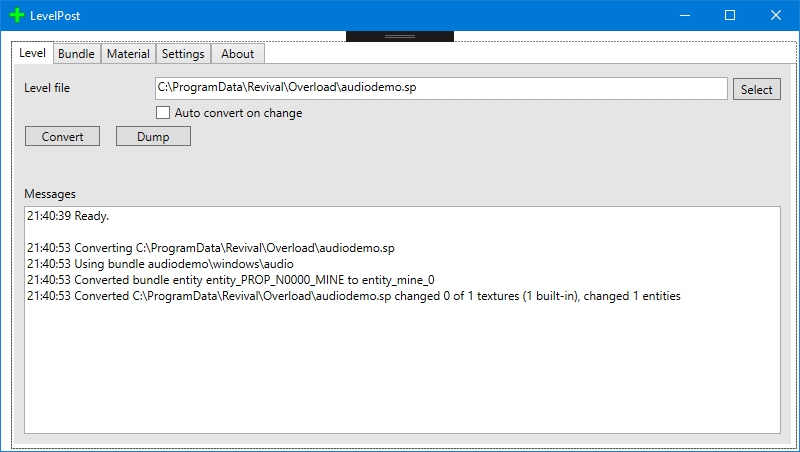
Place a "N0000 Mine" prop entity with index 0 in the level with the level editor. This will be converted by LevelPost to the entity_mine_0 prefab we have created in Unity. Export the level, select the level in LevelPost and press convert. It should tell you it has converted the prop to the entity_mine_0 asset.
LevelPost will overwrite your level file. If the export from the editor takes a long time, don't enable "Auto convert on change" in LevelPost and make a backup before converting the level so you can quickly try again if something goes wrong.
Remove the music line from the mission file if it is a single player level and start the level in Overload. You should hear your music.